
Step by step, with pictures.
From your manuscript to a finished ebook and paperback. Each guide starts with a short video, then the steps.
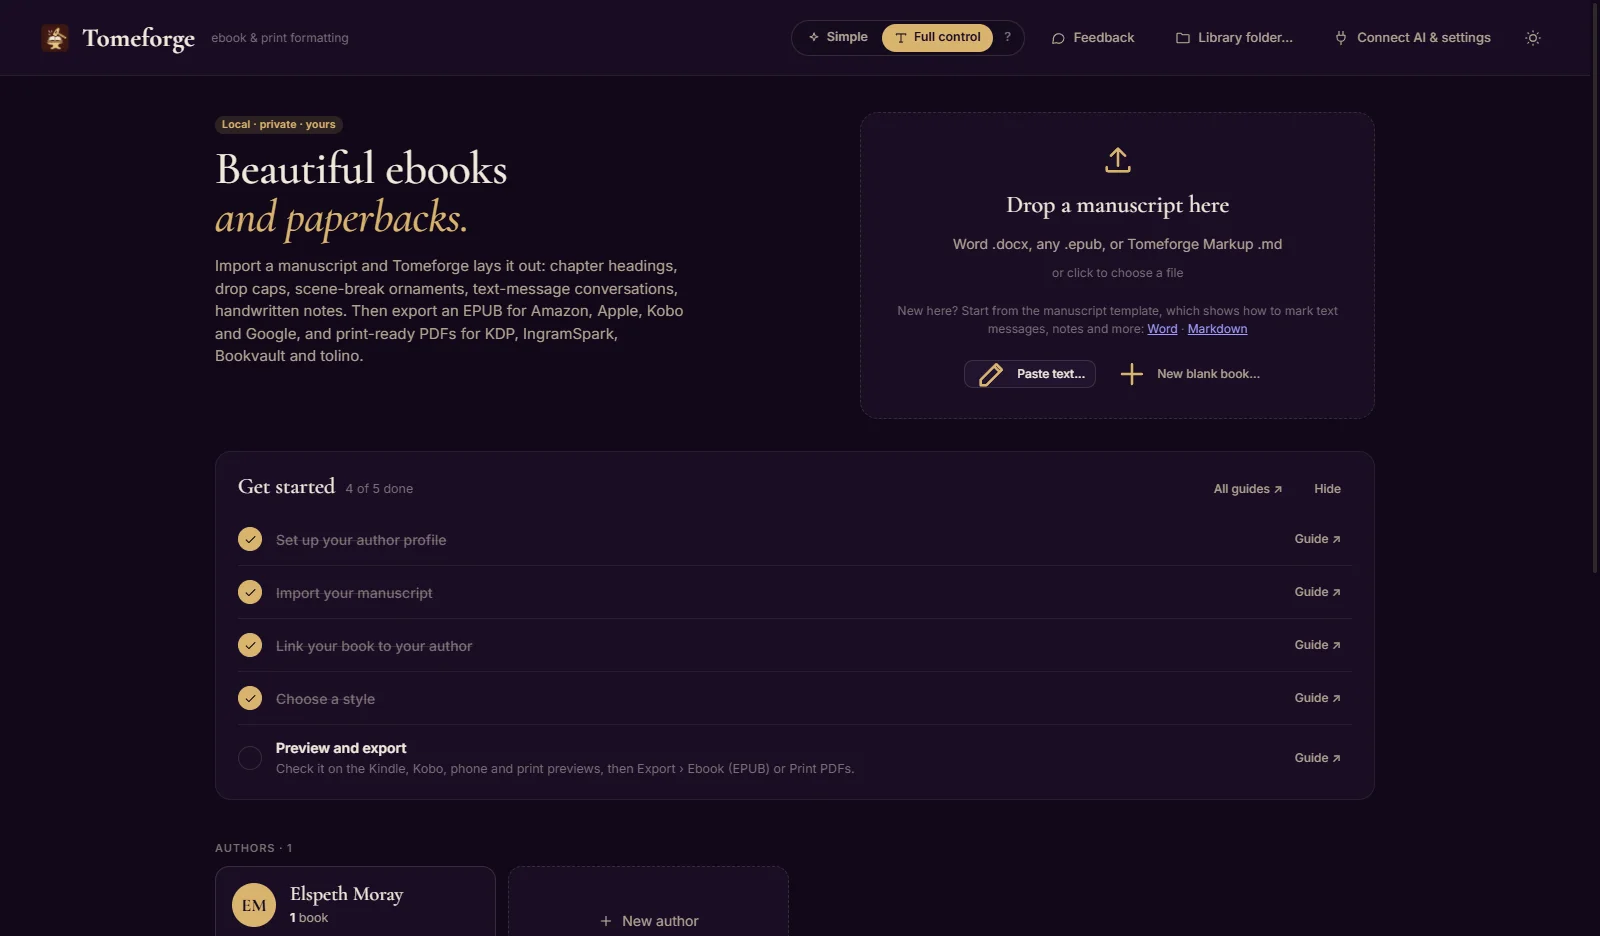
In Tomeforge, the Get started list in your library ticks these off as you go. Help › Getting started brings it back any time.
Set up your author profile
Your bio, Also by list, newsletter page and copyright page, written once. Every book you link to the profile gets the latest version, so you never update them book by book again.
In the library, under Authors, click New author.
Type your pen name, choose its first language, and pick where to start from: blank pages, the pages of a book already in your library, or a book file (Word or EPUB). From a book file, Tomeforge takes only the author pages and leaves the book itself out of your library.
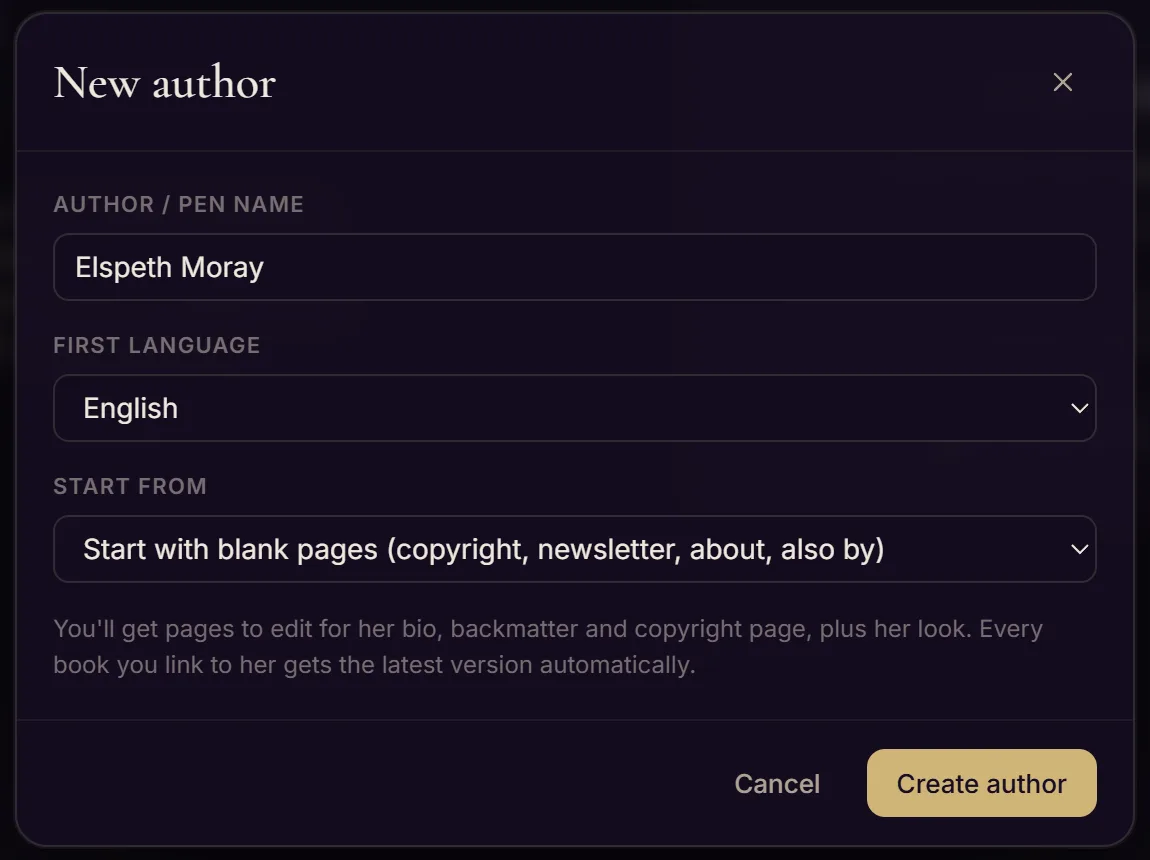
Click Create author. Your author page opens. Click Edit pages & style to write the pages.
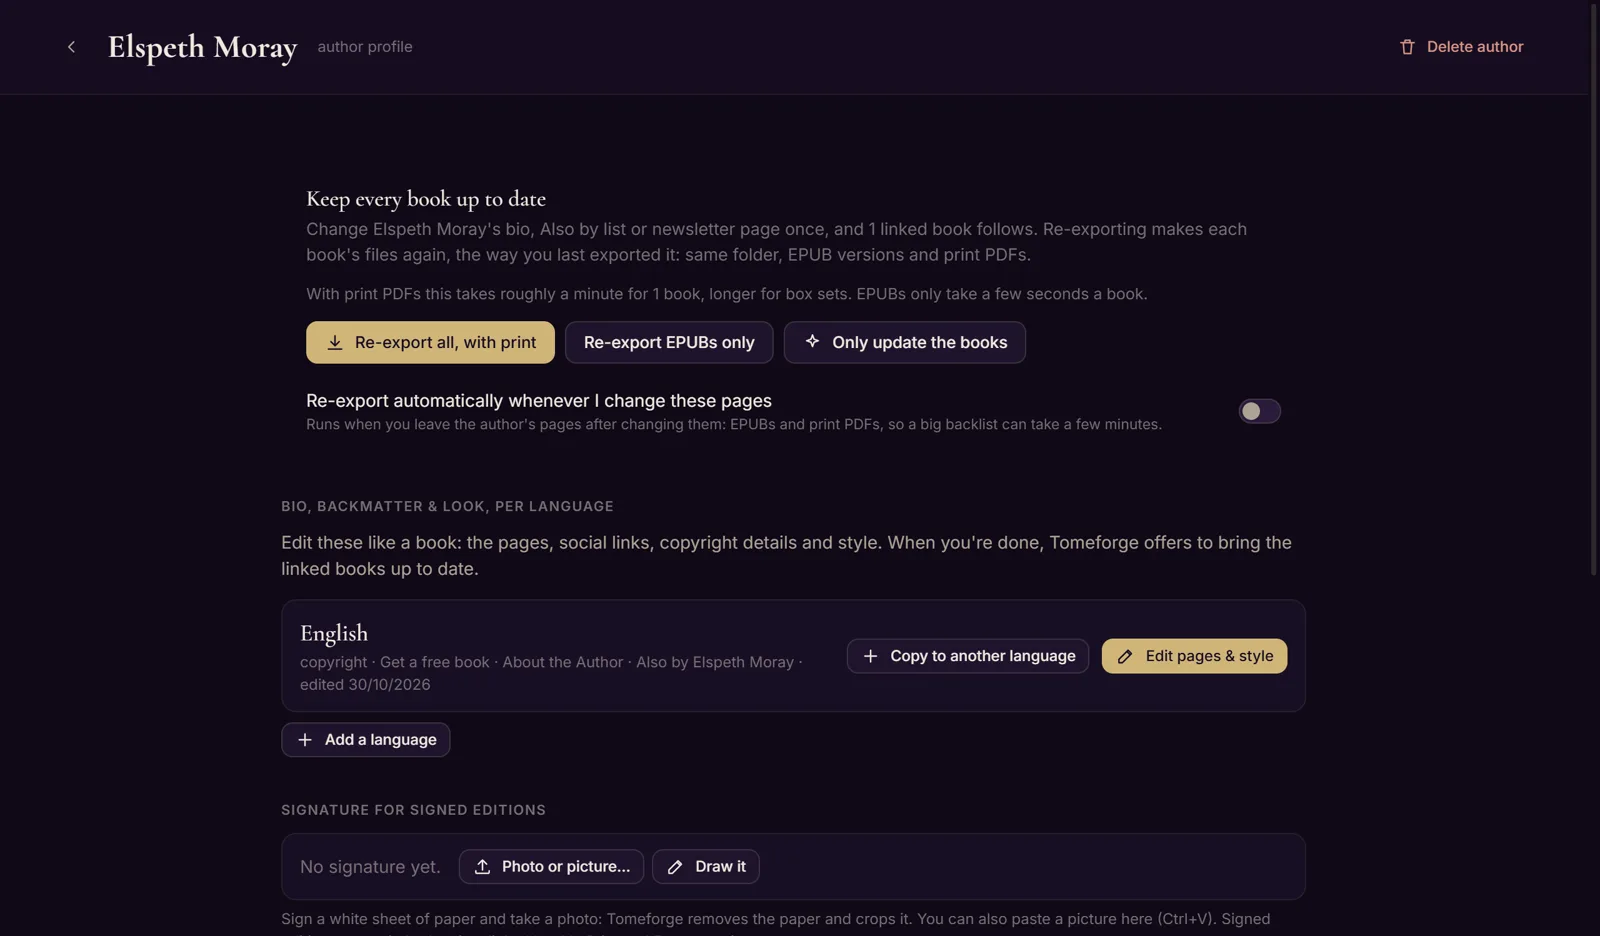
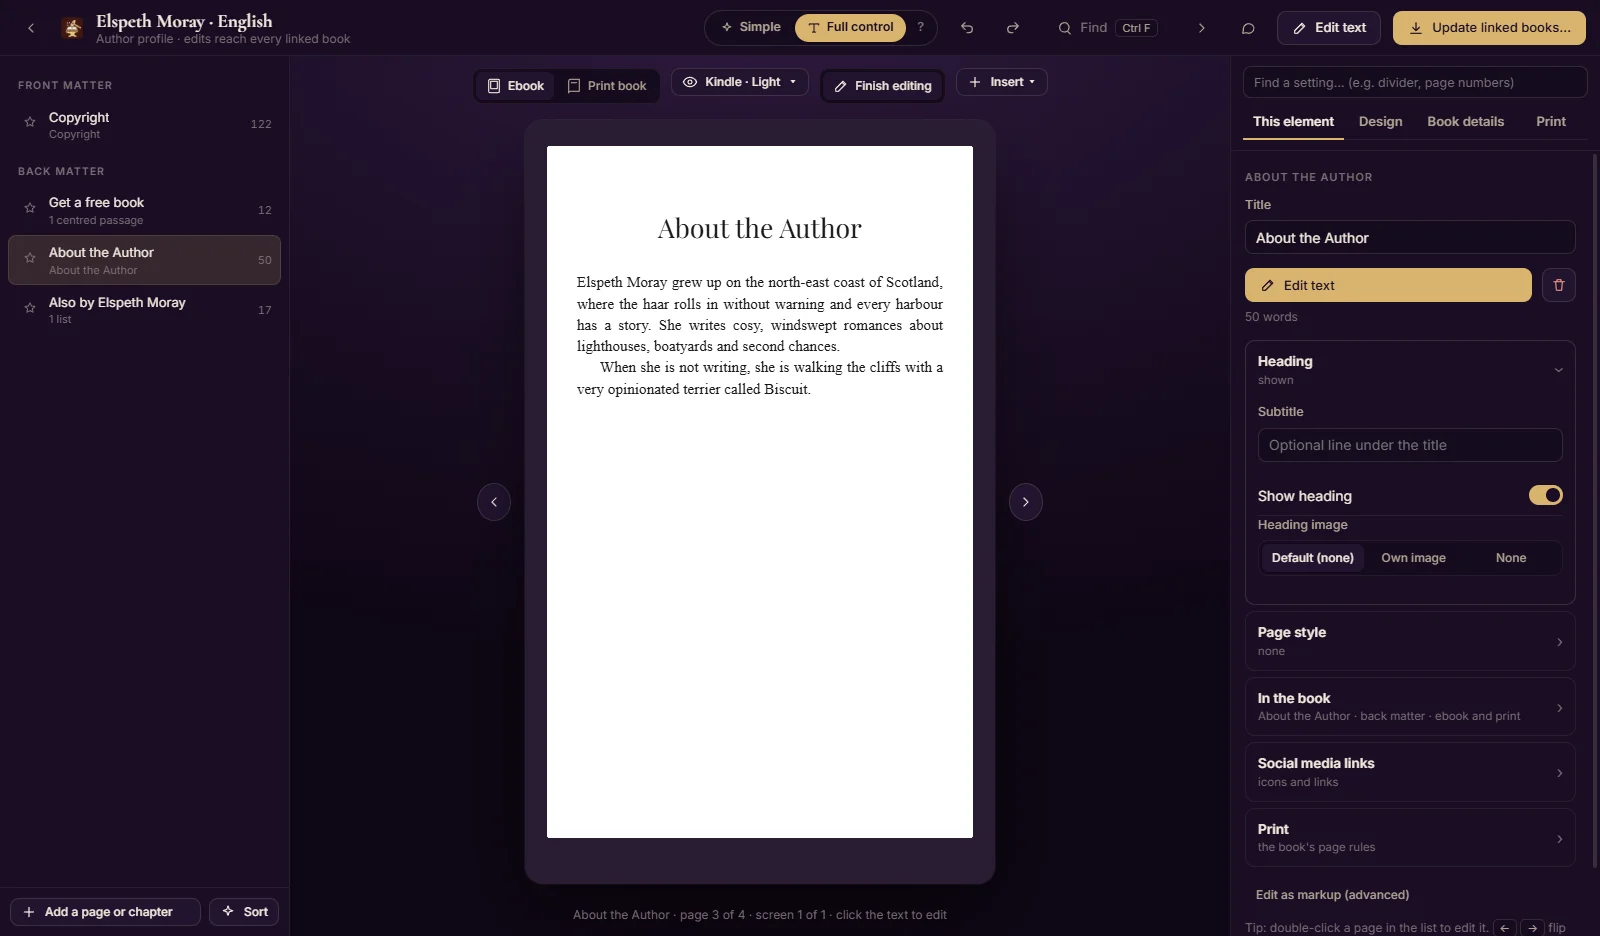
Edit the pages like any book: click a page on the left, then click its text in the preview and type, or use Edit text on the right. Social links, your website and the copyright details are on the Book details tab. The look you choose here becomes the author’s look.
Tip: Writing in more than one language? On the author page, Copy to another language keeps your logo, links and look, so you only translate the words.
Back to the top ↑Import a Word manuscript
Tomeforge reads your chapters, scene breaks and formatting from a Word file (.docx) and lays the book out for you.
Drop the .docx file on the box at the top of the library, or click the box to choose it.
Pick your Author: the book gets your bio, back matter and look straight away. Leave the language on Recognise it from the text and the theme on The author’s theme, or choose another theme.
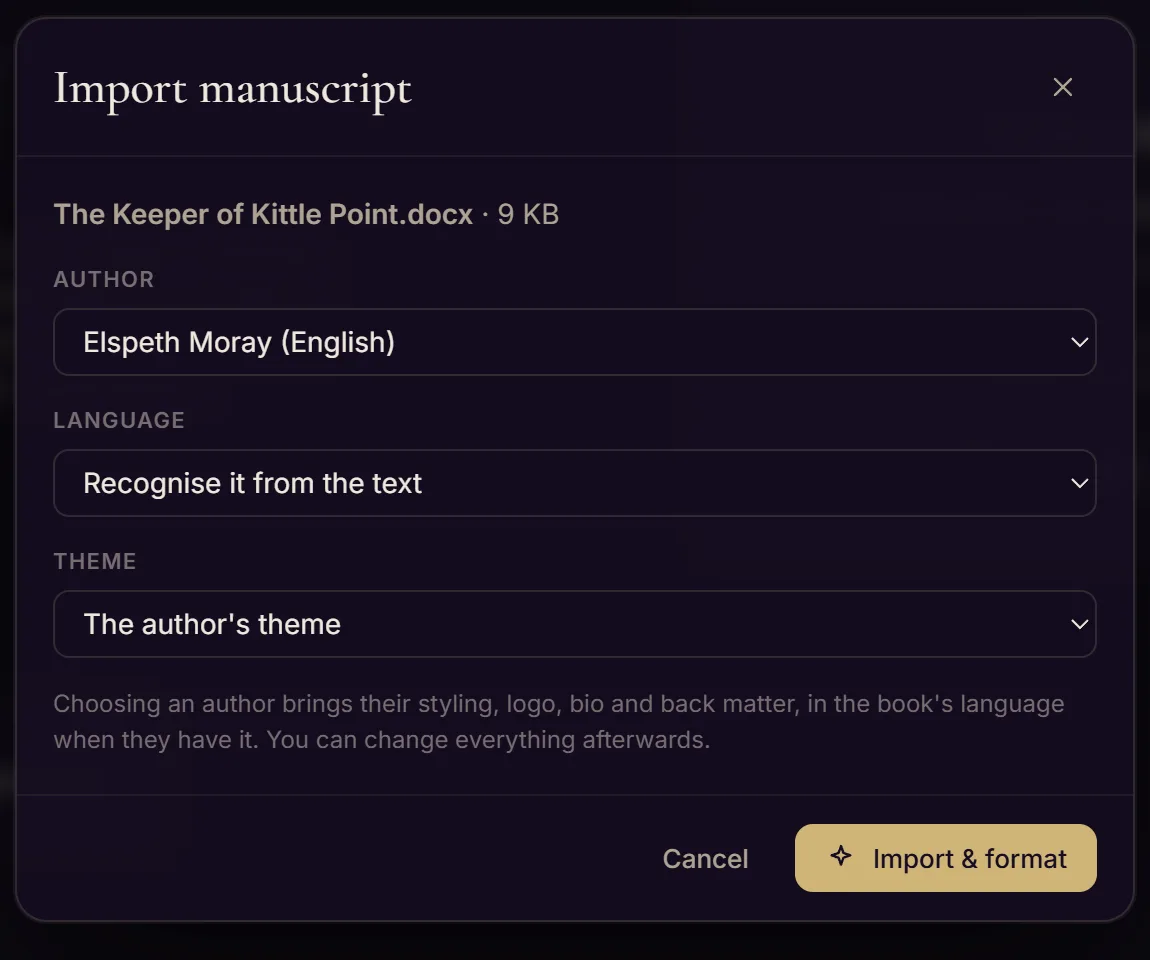
Click Import & format. Tomeforge tells you what it found: the number of chapters and words, scene breaks, text messages and anything it set aside. Anything worth checking comes first, with a warning sign.
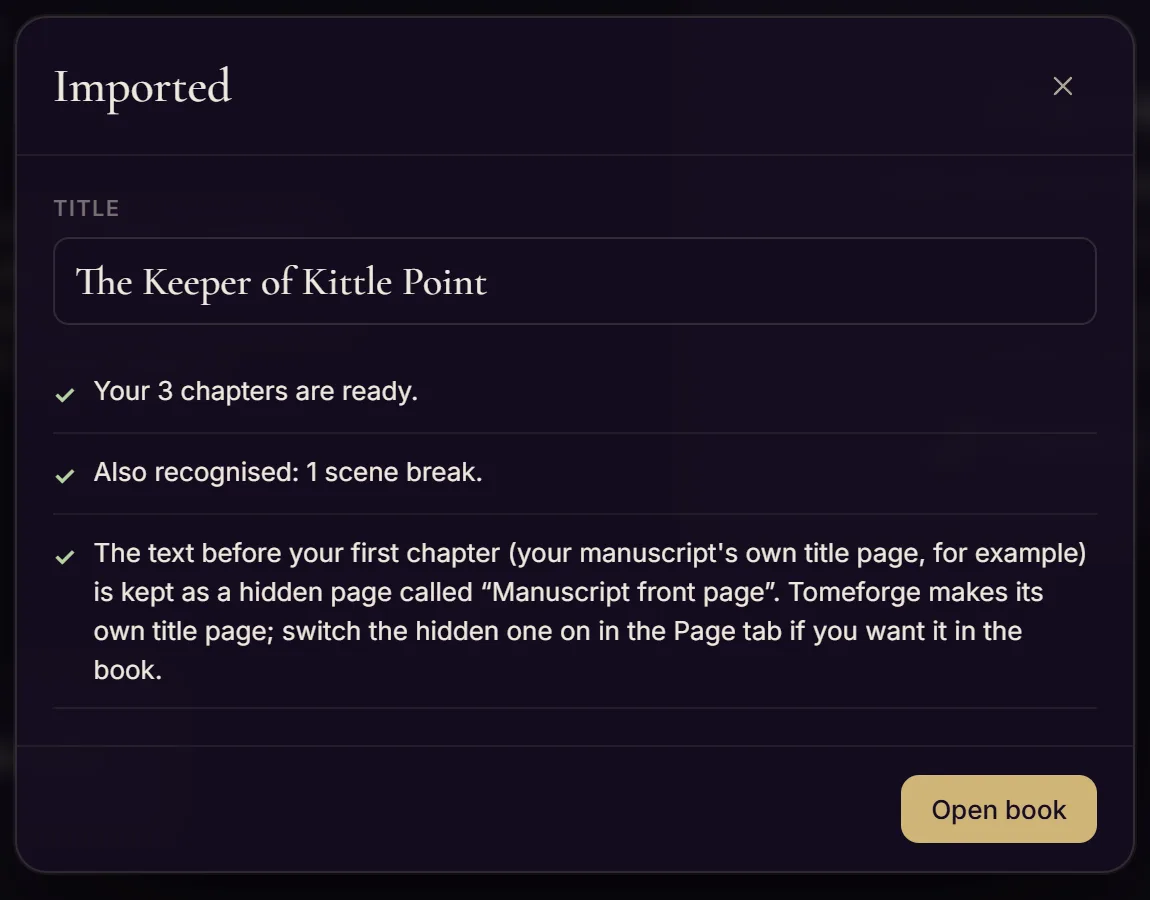
Click Open book. Your chapters are on the left, the preview in the middle and the settings on the right. New to Tomeforge? Click Guide me through it instead: a short step-by-step guide walks you through the book, from chapters to your finished files. You can start it again any time with the Guide me button at the top of a book.
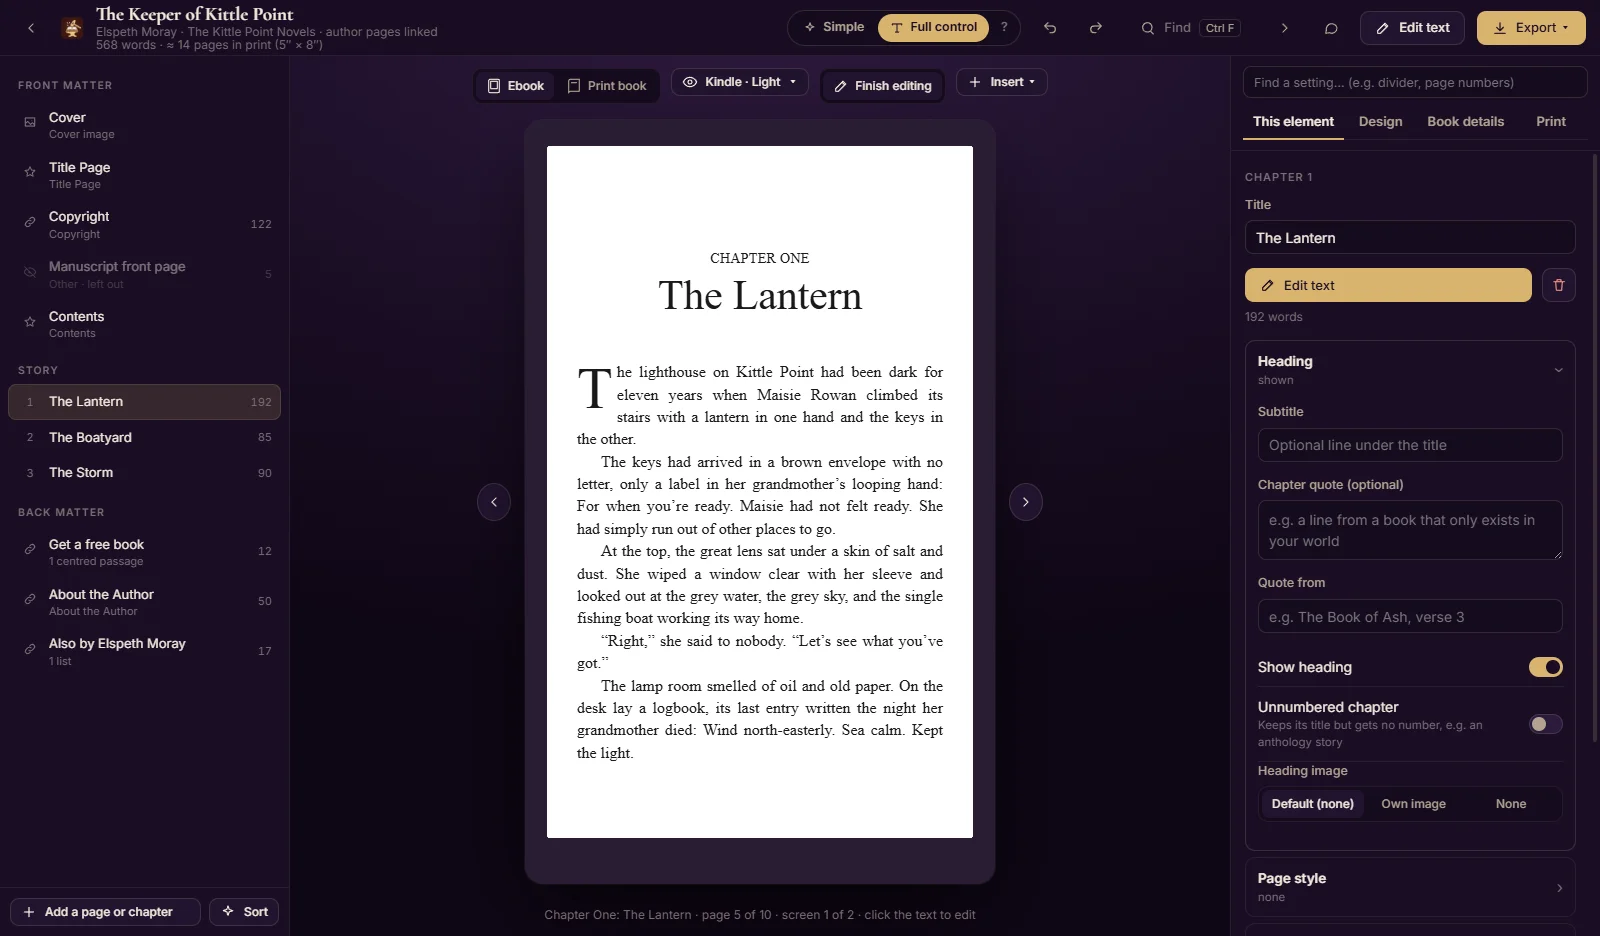
Tip: Chapters are found from Word’s Heading 1 style, or lines such as “Chapter 1”. For text messages, notes and letters, start from the manuscript template (the link under the drop box), which shows how to mark them.
Back to the top ↑Import an EPUB
Bring in a book that is already formatted, for example one made in another app. Export it from there as a generic EPUB first.
Drop the .epub on the box at the top of the library.
Pick your author. Tick Keep this book’s look to copy its fonts, headings, drop caps and scene-break ornament into a new theme of your own, or leave it unticked and pick one of Tomeforge’s themes.
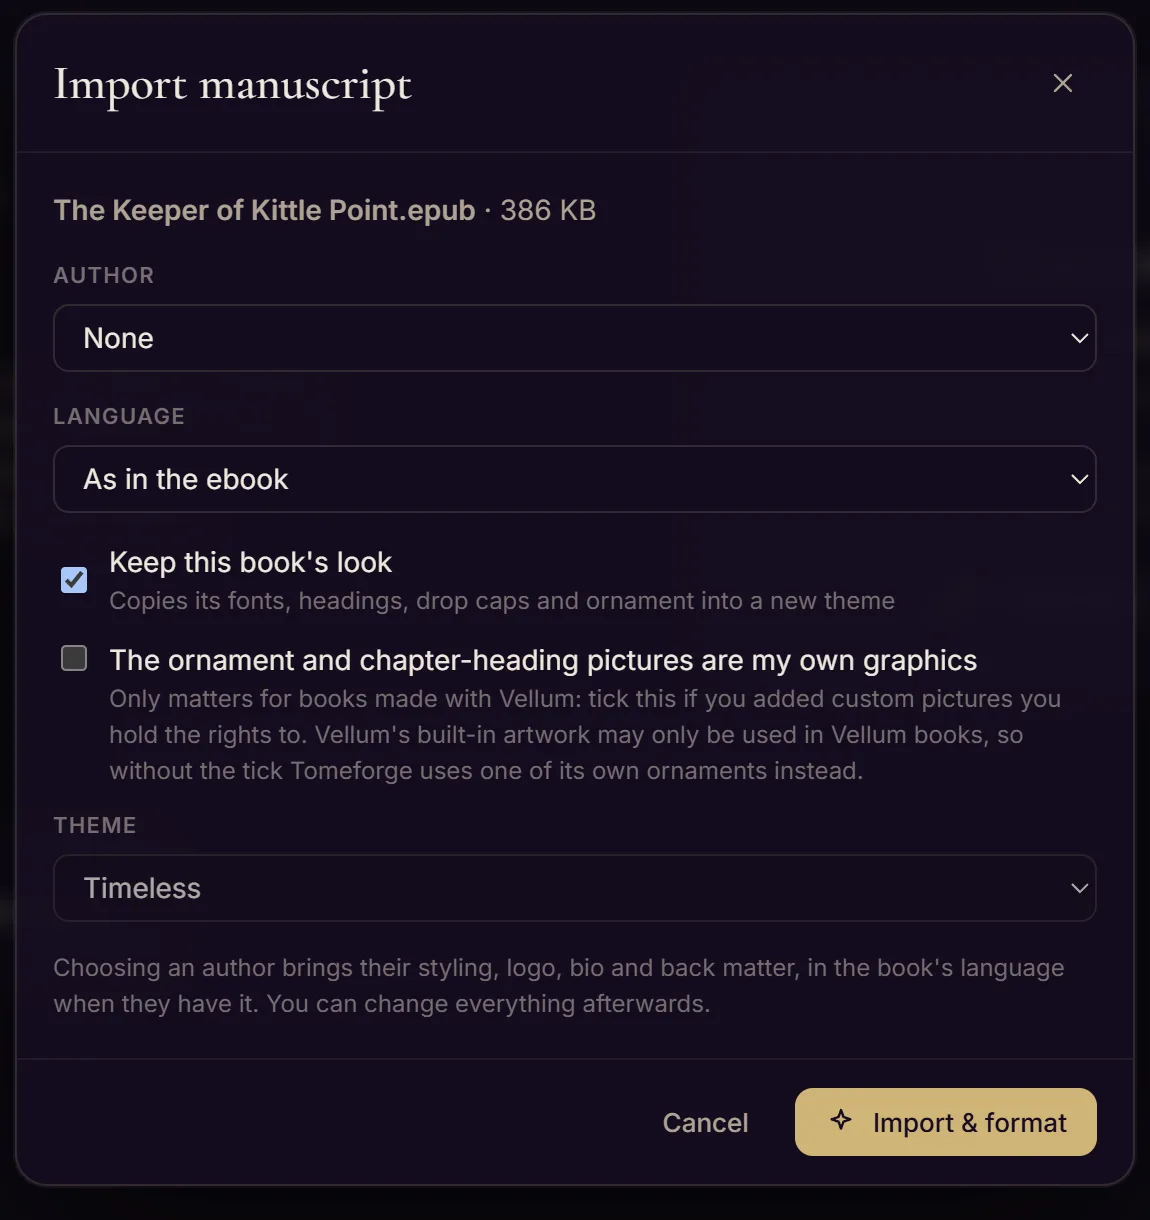
Click Import & format, then Open book.
Tip: PDFs can’t be imported: a PDF only records where each letter sits on the page, not which line is a chapter heading or a text message. An EPUB or Word file keeps all of that.
Back to the top ↑Link a book to your author
Did you import a book before you set up your author profile? Link it, and its author pages come from the profile from then on.
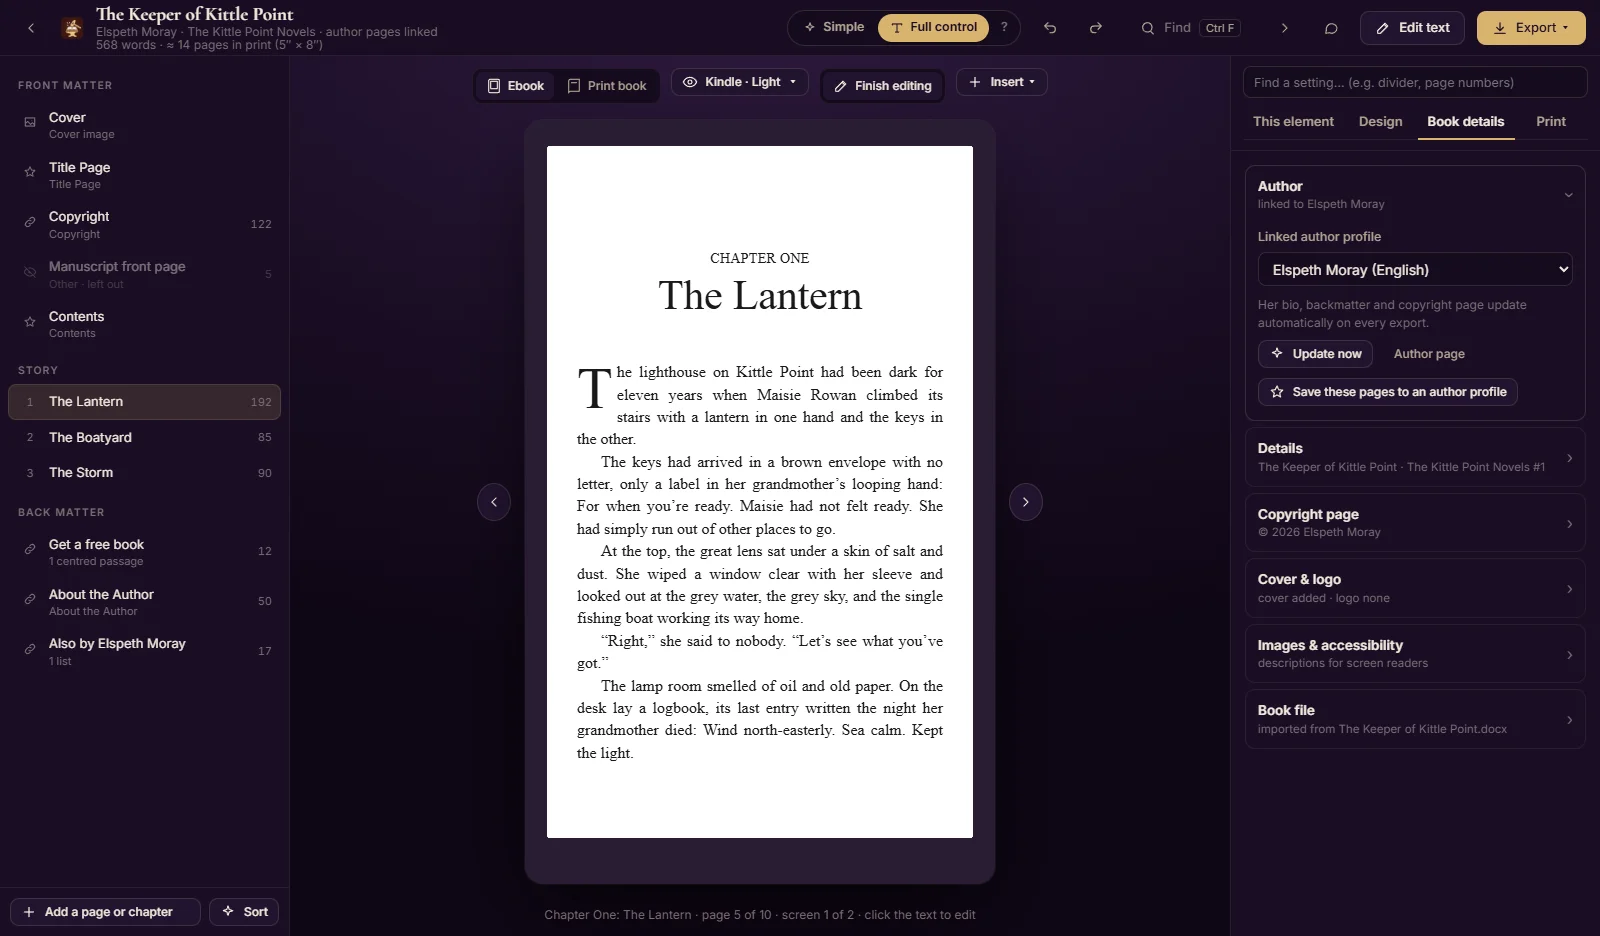
Open the book and click the Book details tab on the right. Under Author, pick your author in Linked author profile. (In Simple mode it’s under Details.)
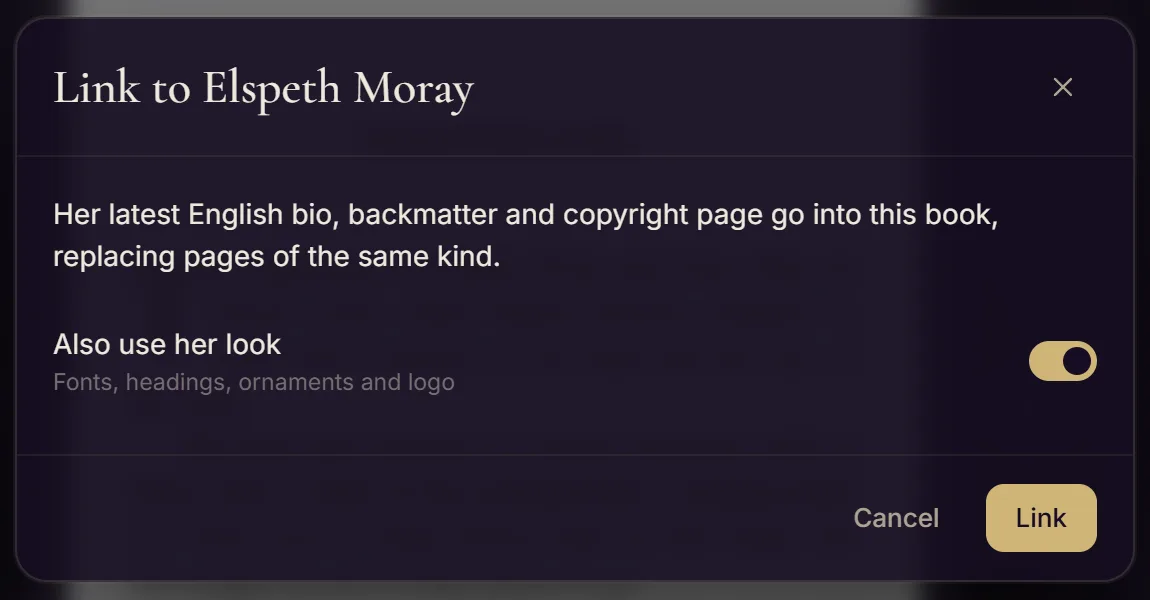
Keep Also use her look switched on to give the book the author’s fonts and headings too. Click Link.
The author’s pages appear in the book with a little link mark. Change them on the author page and every linked book follows. Want one book to have its own version? Click the page and choose Keep this book’s own version.
Choose a style
Pick a theme made for your genre, then fine-tune it.
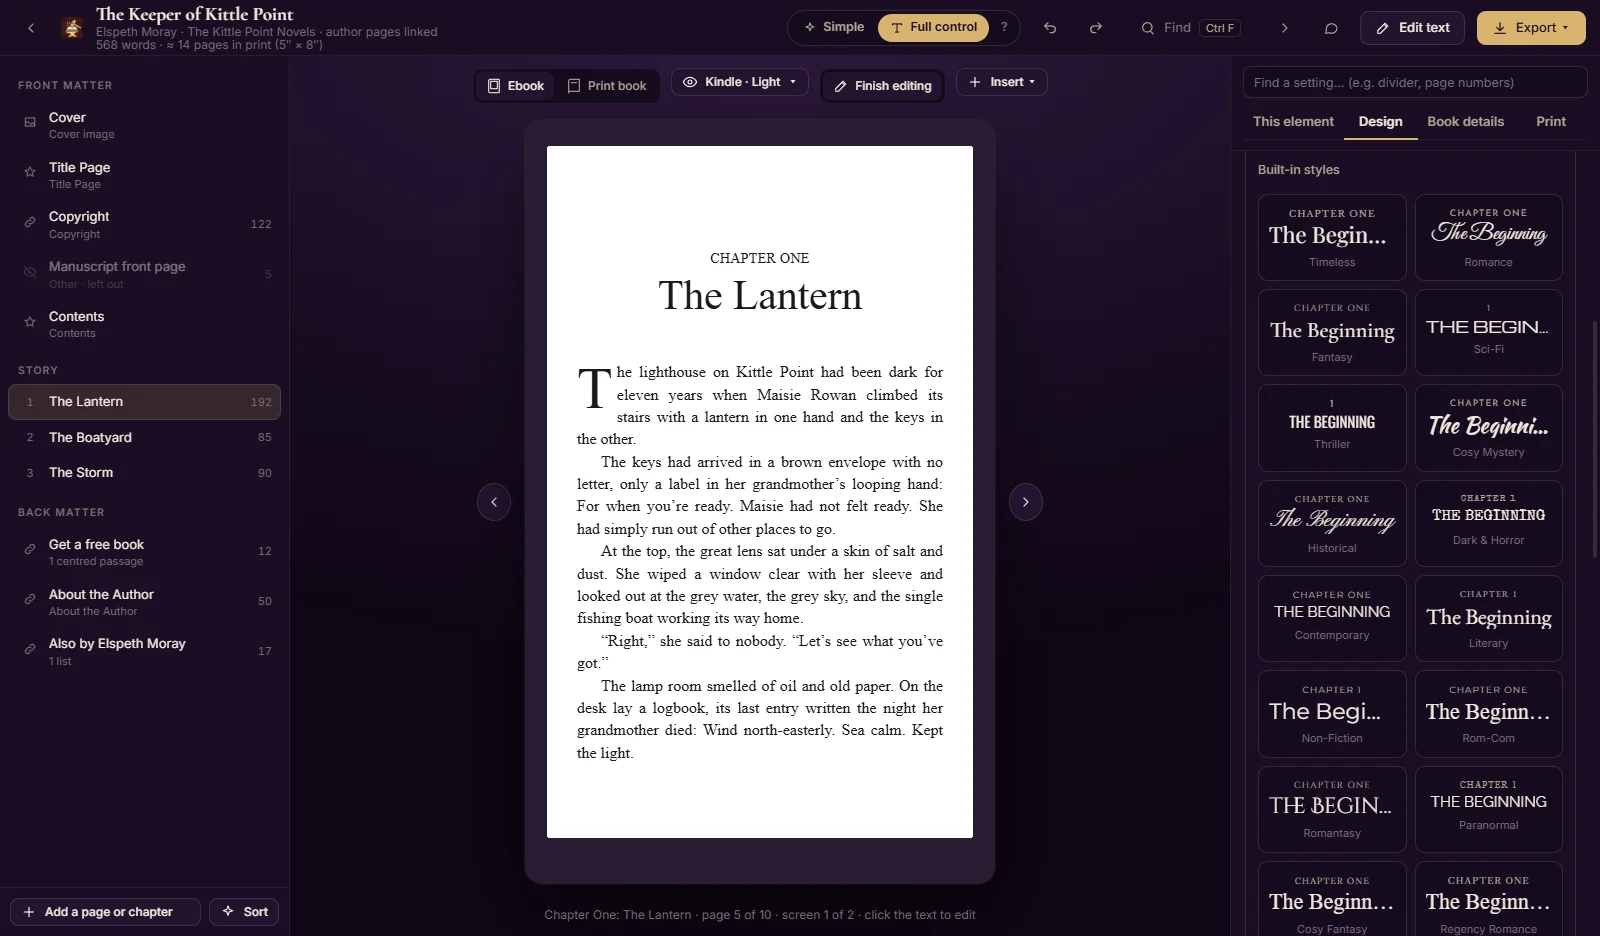
Open the book and click the Design tab. Click a theme under Built-in styles and the preview changes straight away. Try a few: nothing is lost by switching, and Undo brings the last one back. In Simple mode, click a look under Look.
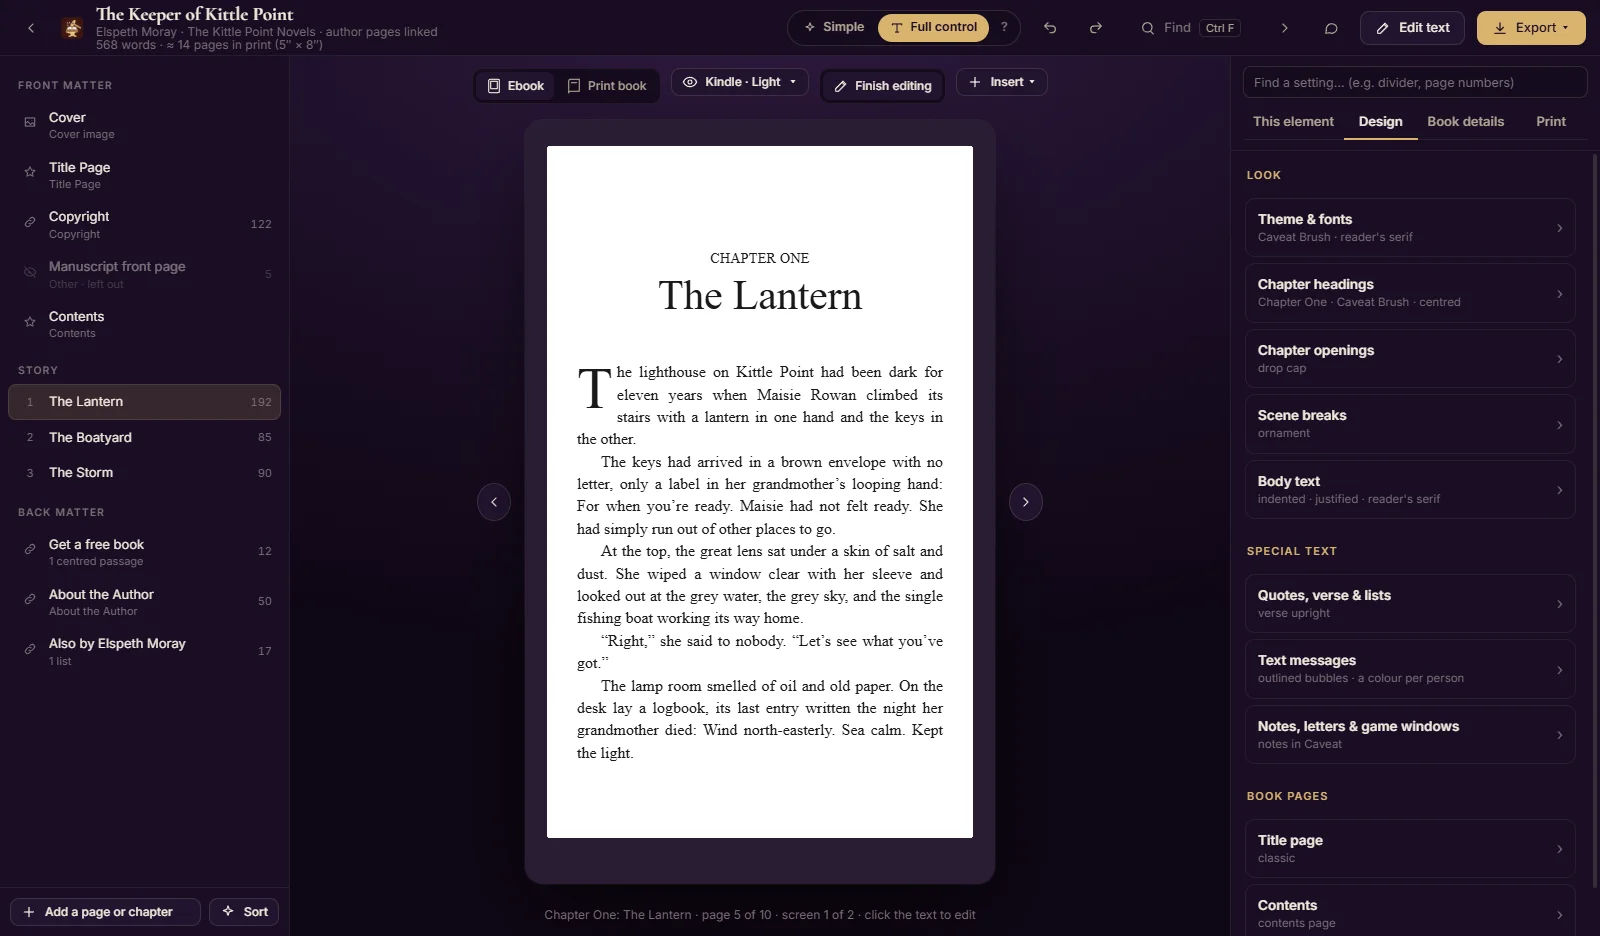
Then open the sections below the themes to adjust the details. They’re in three groups: Look (chapter headings, chapter openings and drop caps, scene breaks, body text), Special text (quotes and verse, text messages, notes and letters) and Book pages (title page, contents). Can’t find a setting? Type what you’re looking for in the search box above the tabs.
Want a change for one chapter only, such as a picture on its opening page? Select the chapter and click Settings for Chapter 1 (named after the chapter you selected) above the preview. Every panel says what a change affects: the whole book, the print book only, or only this chapter.
Happy with it? Save this look as my theme keeps it for your next books.
Fix a typo on the page
No need to go back to Word for a small change: click the text in the preview and type.
Click the text in the preview. On the Kindle and Kobo views the page then scrolls while you edit.
Select the word and type over it. Select more text to get the formatting bar (bold, italic, small caps, links, left, centre and right) and the Turn into button for text messages, notes and other special blocks.
Changes save as you type. When you’re done, switch Typing on the page off, above the preview.
Preview it like a reader
See the book the way readers will, before you export.
At the top of the preview, click the View button (it shows the e-reader you’re looking at, e.g. “Kindle · Light”) to switch between Kindle, Kobo, Phone and Tablet, and between Light, Sepia and Night. A− and A+ in the same menu change the text size, as readers do.
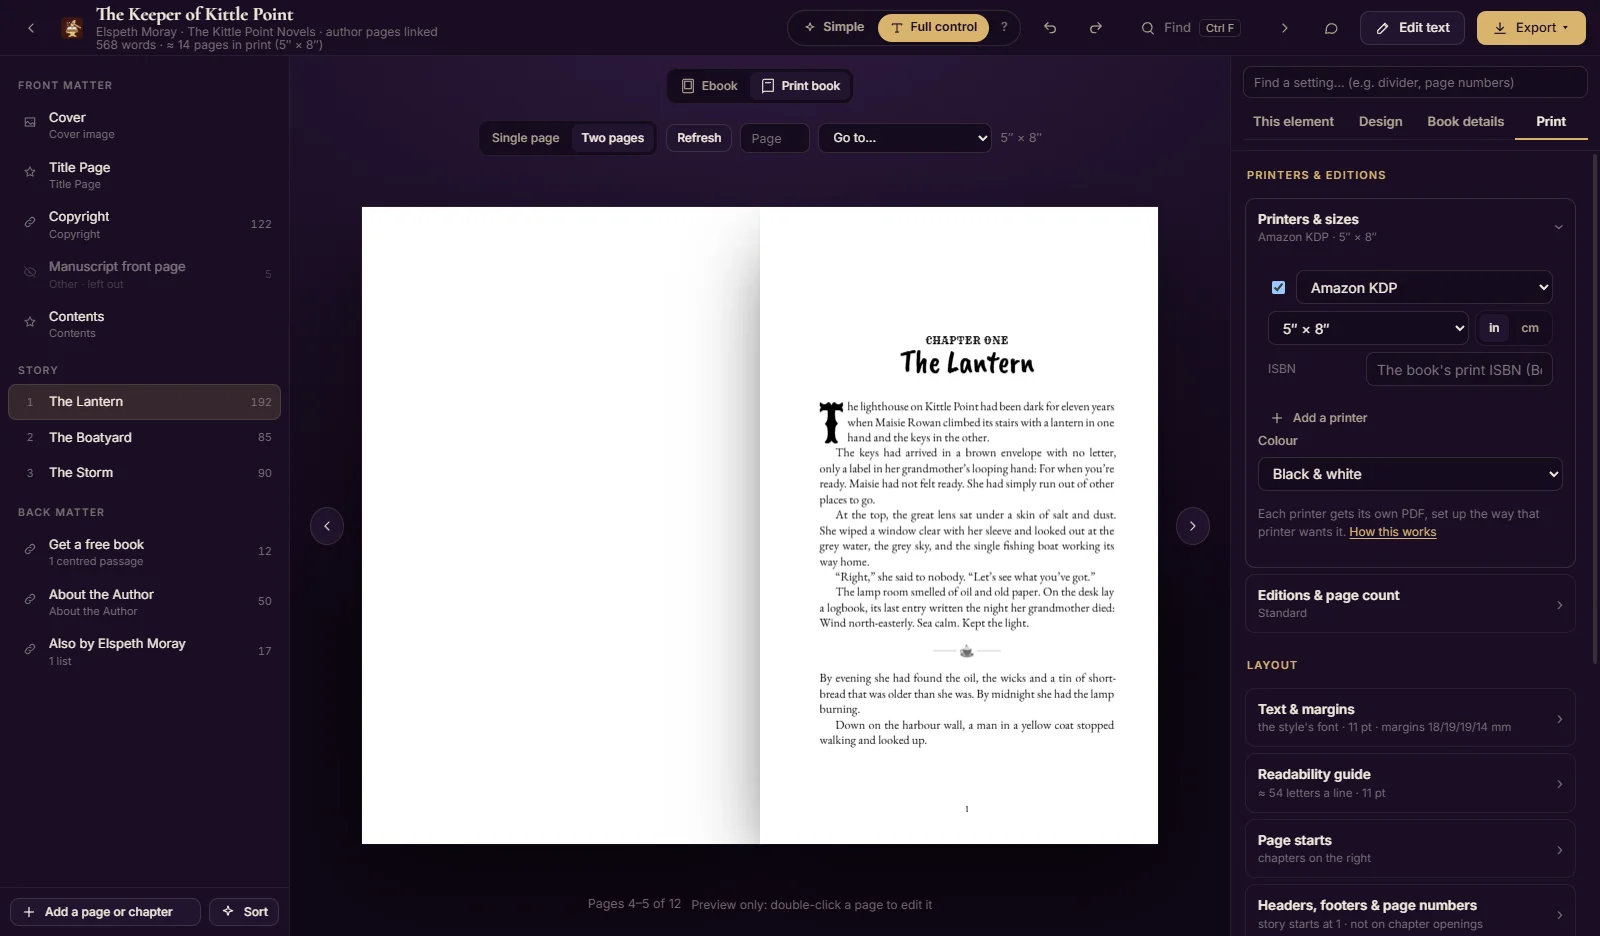
Click Print book to see the paperback, single pages or two pages side by side, trimmed the way a reader holds it. If the book has artwork to the page edge, Show bleed shows the extra margin the printer cuts off. Trim size, margins and printers are on the Print tab.
Export your ebook and print files
One EPUB works for Amazon KDP, Apple Books, Kobo, Google Play, Barnes & Noble, BookFunnel and Draft2Digital.
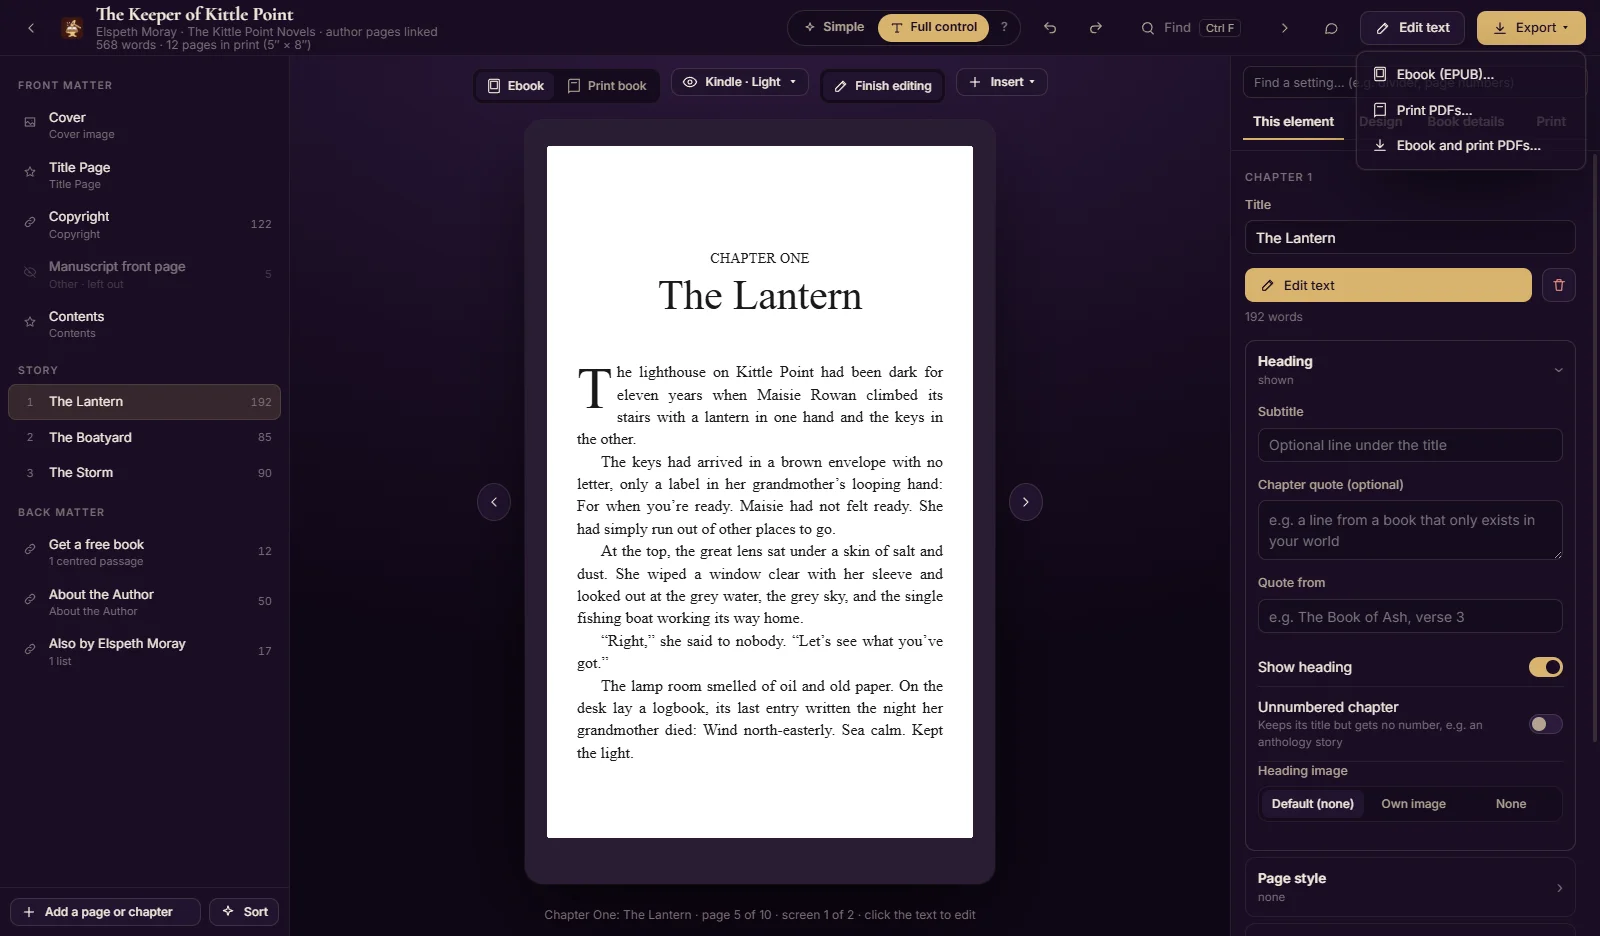
Click Export at the top right and choose Ebook (EPUB), Print PDFs or both. In Simple mode the button says exactly what it makes, e.g. Make ebook + 1 print PDF.
Tomeforge checks the book first. Choose where to save it, and switch on any extras: a Google Play version, a smaller Kindle file, the ebook’s picture size, a signed edition for your own shop, or the print PDFs.
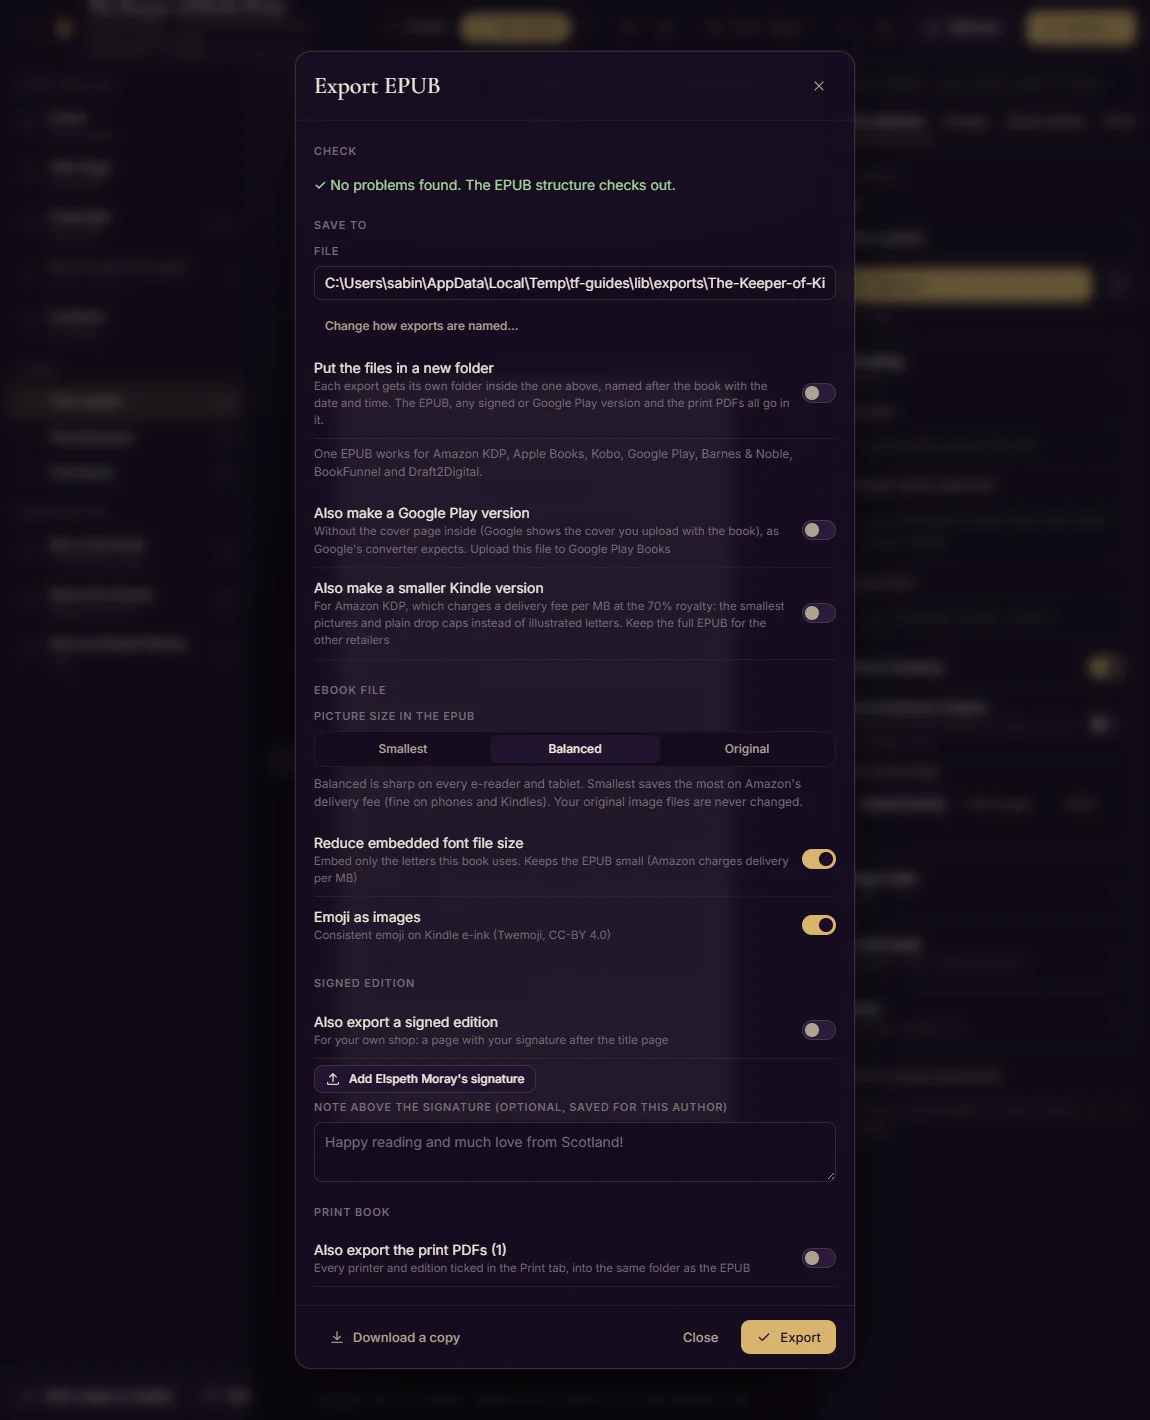
Click Export. Show in folder takes you to the file, ready to upload.
Tip: Exporting needs your licence. Everything else works in the trial, so you can try your own book first.
Back to the top ↑Still stuck?
Click Feedback in Tomeforge's library, or email [email protected]. Tell us what you were trying to do and we'll help.